
New guide on how to migrate a OVH webhosting to a VPS running ubuntu with Apache, obviously all the files, database will be the same, but on a better performing machine So, what we all waiting? Let’s start!
Requirement
The only requirement is to have a running Apache server, if you don’t have one follow this guide to set it up.
Downloading the website
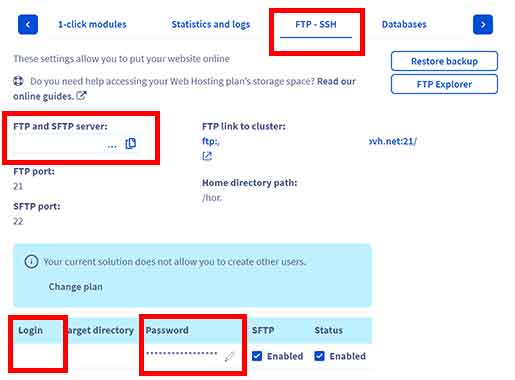
Now that you have the web server ready go to the Web Cloud section on the left sidebar click hosting, and then select your host. In this tab click on “FTP – SSH”.
Here you’ll find the server ip, under the voice: “FTP and SFTP server” and the username which is located at the bottom. On the same line of the username you’ll find the password which you can modify at any time. We suggest changing it with something you know and then log into the webhost. Now using any FTP or SFTP software connect to the vsp and transfer the hole website to your machine. We recommend using WinSCP for all the Windows users, since you can make multiple connections while transferring files.
Dumping the database
This step is optional, because you may be running a “basic” html file. However some users could use a CMS like WordPress. The process won’t change, click the “Database” tab. Locate the database you want to dump, click on the three dots, and then click on “Create Backup”. Wait for OVH to make the backup for you (10 min, you’ll get an email when its done). Once it’s ready on the same row locate the “Backup” column, on the right side of the number there’ll be a little icon with a pen in it, click it. On the last backup click on the three dots and download the dump.

Removing SSL and DNS
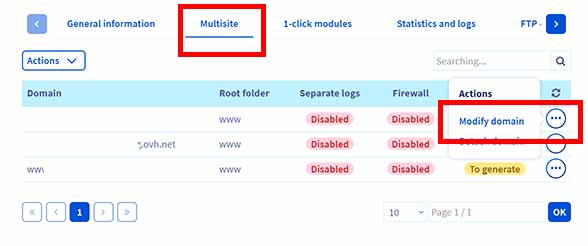
Later on you mostly likely to enable the SSL so you have to disable it on OVH. Click on multisite, and disable everything. Now go to the DNS zone which can be on OVH or any other services and or change (or delete) all the IPs related to the OVH webhost, both IPv4 and IPv6. If you don’t remove everything you may encounter some error later on.
Uploading all the files
Now upload to the VPS in your folder the website, as well as the db dump. We’re going to use /websites/mywebsite.com as folder. Now navigate where the dump is located, and run the command:
mysql -u username -p database < dump.sql
Obviously you have to change the username the database name and the file name.
Creating a Virtual Host file
Now that the website is “ready” you have to create the virtual host file.
cd /etc/apache2/sites-available/
Here create a new file.
sudo nano mywebsite.com.conf
<VirtualHost *:80>
    ServerName mywebsite.com
    ServerAlias mywebsite.com
    DocumentRoot /websites/mywebsite.com/public_html
    <Directory />
        Options FollowSymLinks
        AllowOverride All-
        Require all granted
    </Directory>
    ErrorLog ${APACHE_LOG_DIR}/mywebsite.com-error.log
    CustomLog ${APACHE_LOG_DIR}/mywebsite.com-access.log combined
    RewriteEngine on
    RewriteCond %{SERVER_NAME}=www.mywebsite.com [OR] RewriteCond %{SERVER_NAME}=mywebsite.com
</VirtualHost>
To exit Press CTRL + X, and then follow the instructions.
Now add the configuration file to the Apache service with
sudo a2ensite mywebsite.com.conf
and then restart the service
sudo systemctl restart apache2
Enabling SSL
Important feature which can be enable with certbot. To download it you need snap. So install it with:
sudo snap install --classic certbot
After you’ve downloaded it run:
sudo certbot --apache
To make it automatically generate a SSL certificate and release the secure version for you.
Now open an incognito page and go to the website. Check if everything its alright and enjoy. This is all about how to migrate an OVH WebHosting to a VPS running Apache on ubuntu, stay toned for new guides.